1.1 SET DOWNS
1.1.1 A wet area begins with a good set down in the floor for two (2) reasons;
a. Principally a set down is simply to provide a flush finish between the non-wet areas and the wet areas floor finishes – i.e. – to provide sufficient depth to allow the tile and bedding to be laid to a fall for surface water removal, and remain at the same level at the door way/junction with the rest of the building – typically a 50mm deep set down is provided as a general rule. The alternative is a flat slab with a waterproofed perimeter angle and a door threshold ramp
b. To CONTAIN any water penetration through the floor and wall finishes into the substrate membrane – it’s like a big box gutter and overflow – or a big safe tray under an air-conditioning FCU unit (see roofing and air-conditioning policies for principles). The tiled or vinyl floor moves surface water to the drain, and the membrane set down is a big catch tray for any water that is not taken away by the surface systems and protect the elements in the areas and room surround the wet area.
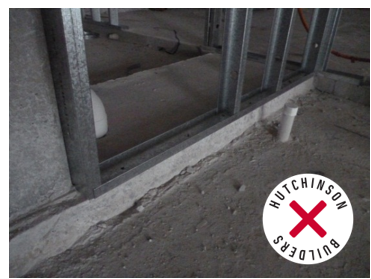
Above - Good substrate – repaired, protected and ready to construct walls
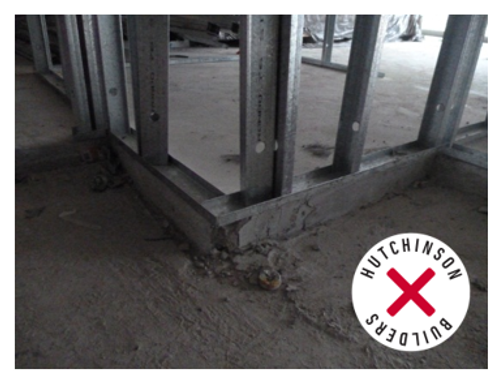
1.1.2 The set downs are usually out of place and require extending (filling) or cutting and removing as they are not in alignment with the correct wall set out. The substrate works (typically concrete) are usually completed poorly (Refer Structure Level and tolerances policy) and require rectification works.
a. Where the set down is too large – wall frames are to be on top of the slab - NOT in the set down. The set down needs to be scabbled, reformed and extended with concrete/non shrink grout (pending size)
b. Where the set down is too small – the set down needs to be saw cut and jackhammered out, and the floor patched to provide a smooth substrate for the waterproof membrane. Reinforcing exposure must be considered as part of these works.
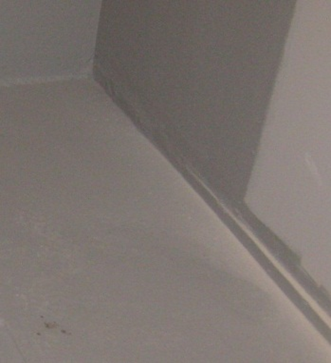
1.1.3 Surface finish for set downs should have a fall to the floor waste drain and shower drain for substrate membrane drainage. We do not want to see a set down PONDING - with any substrate falling away from the drain towards the corner of the rebate where it will find a pinhole and exploit this and allow water to escape the containment limit that the set down area provides.
1.1.4 The surface should be consistently graded and not look like it was screeded with the back of a shovel. The Australian standard states “the area shall be cleaned and dust free. Indentations and imperfections shall be kept to a minimum and repaired where necessary”
Above – unacceptable finish to substrate
1.1.5 Refer the Ardex requirement for surface finish and preparation for waterproof membranes at the rear of this policy
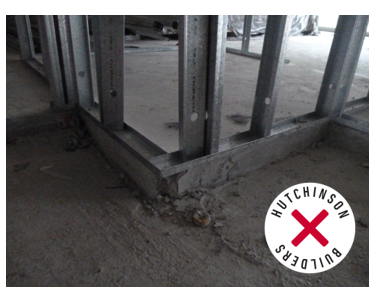
Above - Unacceptable preparation of set downs.
1.1.6 Refer the Ardex requirement for surface finish and preparation for waterproof membranes at the rear of this policy.
A good waterproof wet area starts with a good set down – see also the Structure Level and tolerance policy
1.2 STEPUP BATHROOMS
1.2.1 Principally this is where the bathroom is located on top of the flat slab (NO set downs).
1.2.2 Generally not adopted due to the non-flush threshold of the bathroom. Refer to AS1428 to determine where set downs are or are not required.
1.2.3 The walls are installed and an angle (typically around 40mm to 50mm) is installed across the doorway to “close” the footprint of the bathroom
1.2.4 The area is waterproofed and then the bathroom is constructed as normal and a threshold ramp may be fitted to ease the step up into the bathroom.
1.2.5 Avoids the messy set down form, and concrete rectification.
1.2.6 This method of construction is not preferred and requires approval by the Team leader with consideration to AS1428.
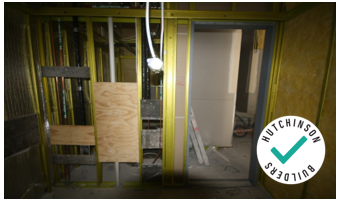
1.3 WALLS
1.3.1 The wet area walls are then constructed outside of the set down area (up on the “dry” non-wet area slab height) to remove any potential for leaks to rust/rot framing and linings. Water naturally finds the lowest point – if it is on the other side of the membrane at the wall and the membrane will fail – the wall will be sitting in a “pond” - the exception of course being the bath framing which is built on the set down slab and protected by the waterproofing.
1.3.2 There are a number of lining products and they all have their specific application/limitations;
a. WR Board (water resistant plasterboard) - green board/aquacheck etc - good for domestic bathrooms with 6mm light ceramic tiles or where there is just a skirting tile and the wall is to be painted. WR boards should not be used in shower areas
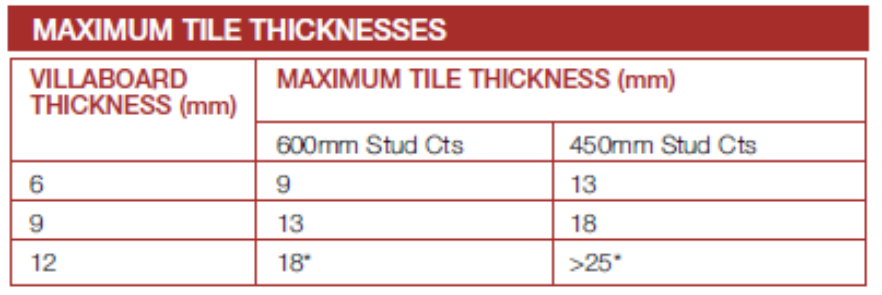
b. 6mm Villaboard – water resistant – more expensive – but suitable for 13mm vitrified tiles (denser material with more weight) and more impact resistant – PREFERRED for typical installations
c. 9/12mm Villa – as above but for areas where thicker stone tiles are being used (the weight of the stone would simply pull the sheet off from the screws – so the thicker board has more board behind the screw head and more resistance to “shearing” or delaminating the villaboard in localised failures under weight of the tiles.
1.3.3 The wall sheeting should stop 8mm off the upper slab as good practice, and sealed by the waterproofing contractor with polyurethane to prevent wicking of any moisture up into the sheet.
Above - wall sheeting stops on the top slab and sealant line clearly visi
1.3.4 Where the sheeting does extend to the set down slab (not preferable), again the sheeting is stopped 8mm above the floor and the gap sealed with polyurethane by the waterproofer.
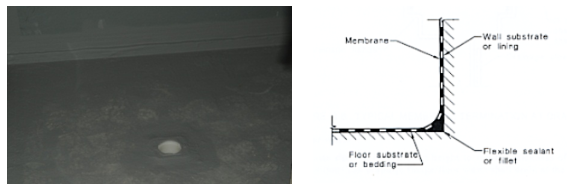
1.3.5 The wall to floor junction – either concrete slab or slab/linings - is sealed with polyurethane to form a “coved” junction/bond breaker prior to waterproofing.
1.3.6 This is referred to as the “bond breaker” in the standards. This means that where membrane is normally “bonded” to the floor to wall, the junction detail is not bonded – the bond breaker (coving) leaves a small section of membrane bond to a flexible sealant, rather than bonded to the structure. This relieves the stress on the junction being transferred into the waterproof and causing failure.
1.3.7 The coving/bond breaker is required to “turn” the membrane from the horizontal floor surface to the vertical wall surface. Without this, the membrane has no flexibility against movement at the “tear point” junction between the sharp perpendicular (90 degrees) wall/floor junction.
1.3.8 While most manufacturers use Polyurethane (PU) as a bond breaker – check prior to application - some manufacturers (Ardex) require Silicone as PU is not compatible with their membranes.
1.3.9 Wet area base coat will be used as the base compound in wet areas in accordance with the Manufacturers Recommendations. NB Individual Manufacturers total coating systems are to be used throughout to avoid any compatibility and warranty issues regarding mixing manufacturers base coat, top coat compounds etc.
1.3.10 Wet area durable sheets will not contain gaps or junction spaces more than 5mm wide
1.3.11 Ensure nogging as are installed (refer policy for walls and ceilings)

1.3.12 Wet areas include or are parts of these areas: bathrooms, WC, laundries or Kitchens. Villa board or FC sheet must be used in these areas or in any room containing splash backs as required under AS3740.
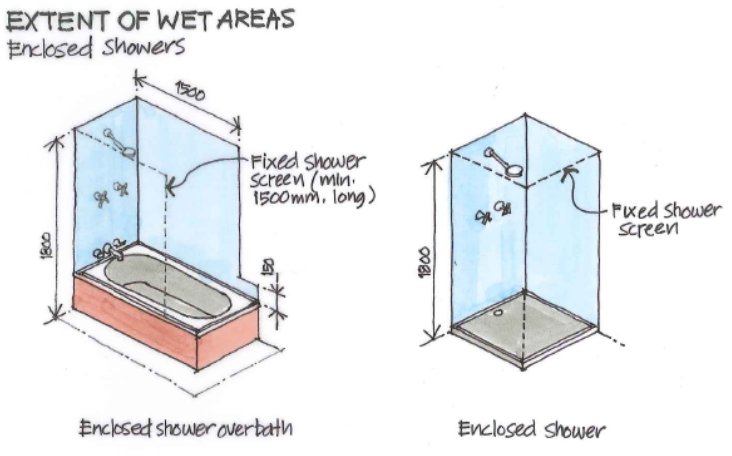
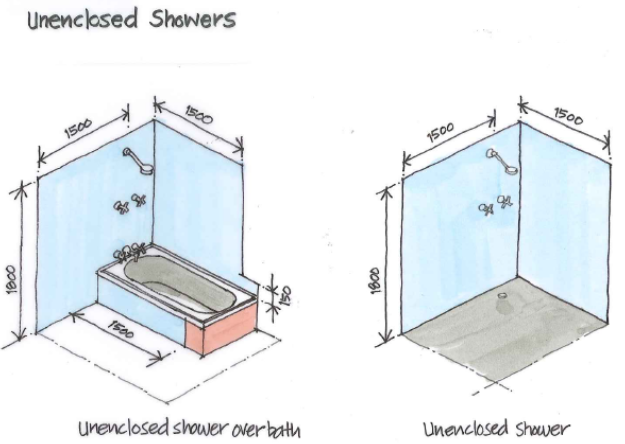
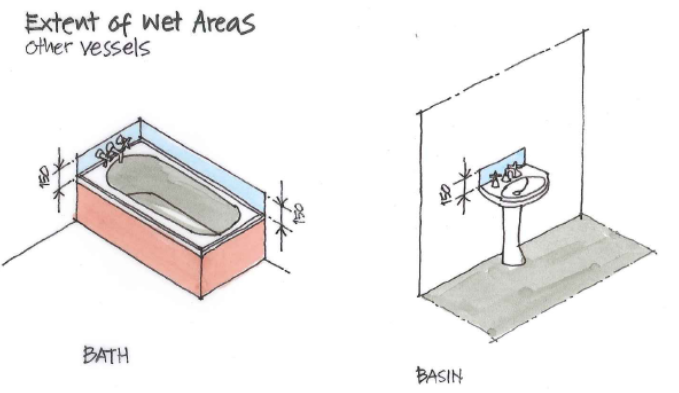
1.3.13 Refer next page for diagrams for typical extents of wet areas to be treated with water resistant materials as a minimum + AS3740 waterproofing wet areas.