2.1 Render joints must be planned out with the Architect & Engineer up front. Mark up the location of the joints based on masonry control joint locations, slab to block work cold joints so the Design Team can approve the joint locations in principle prior to commencement.
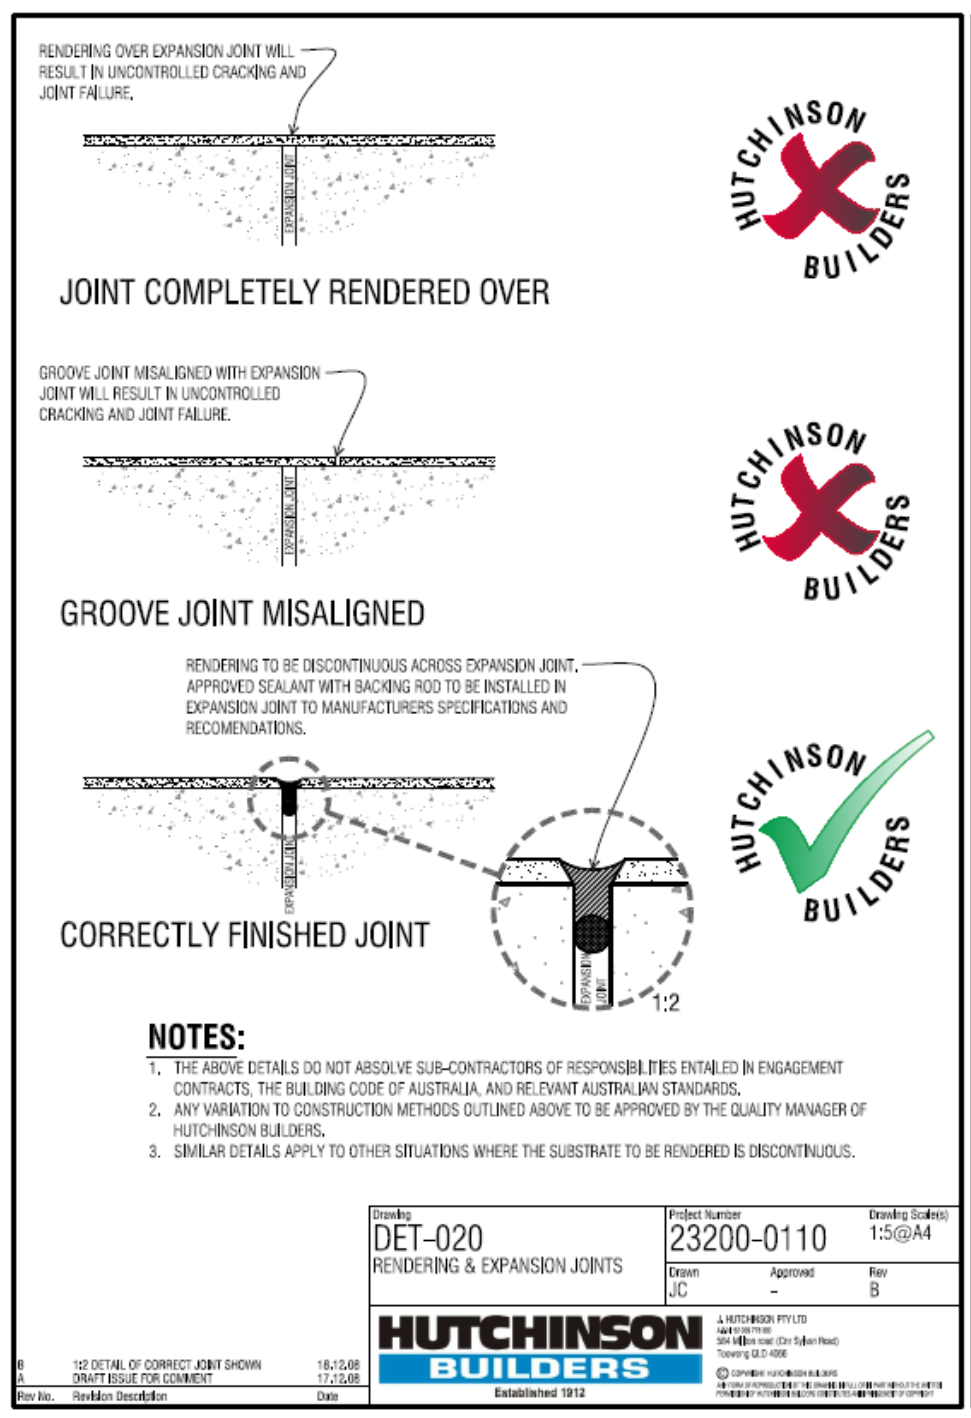
2.2 Struck ‘V’ surface joints (dummy joints) along cold, control, expansion, shrinkage or construction joints are prohibited. All such joints will be marked with a nail each end and string line during rendering with no exception.
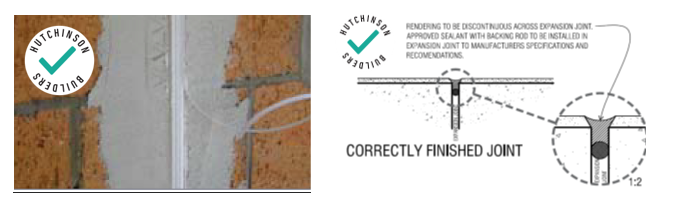
2.3 In other words, don’t render over these joints and score a line in the render where the joint “ought” to be with the render trowel! Mark it out, and stop the render each side or IDEALLY, use the proprietary PVC render trims which are installed at the joints prior to rendering. These allow rendering to progress on each side of the joint easily.
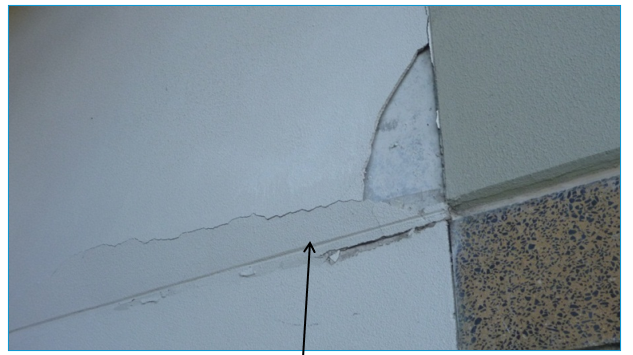
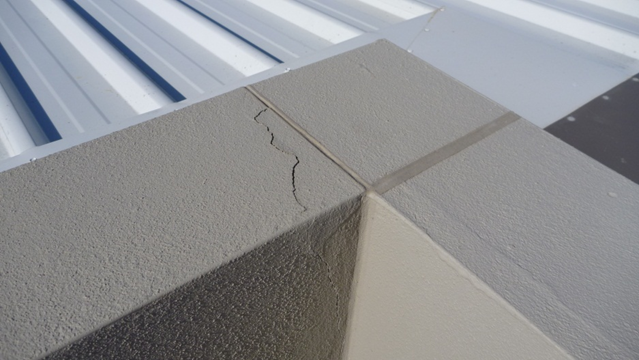
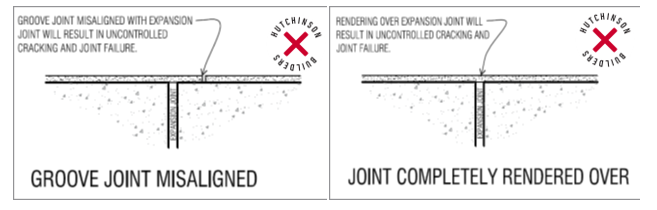
Above - Joint misaligned and was installed as a “scored” line in a seamless render application “hoping” for the render to crack at the movement joint
2.4 The render will be finished either side of the expansion or control joint and returned onto the masonry wall to form a full depth render joint a minimum of 6mm wide. Use a PVC trim control joint for a better quality joint with greater strength.
2.5 Do not render over expansion joints or misalign the groove joint with the expansion joint.
2.6 Joints to be cleaned and primed prior to sealing (joints are to be primed in all circumstances). There are proprietary paints or primers for sealants that allow the polyurethane/masonry sealant to bond to concrete/render/block work etc – don’t just throw a coat of paint on the render and seal to this as the seal is reliant on the tear off/adhesion of the paint rather than using the proper primer and getting a manufacturer warranty. Details of primers for polyurethane and compatible sealants are best procured from the manufacturer of the polyurethane or sealant that is being used on the project by the subcontractor.
2.7 All joints to be sealed using a backing rod with diameter to suit the joint opening width.
2.8 For movement joints in rendering the depth of the sealant should be equal to or greater than the width. In all situations refer to manufacturers recommendations as this may vary.
2.9 The polyurethane seal is to contain a concave shape across the width of the join (do NOT allow flat filled joints) – The objective is to give the polyurethane the ability to expand and be “pulled” by the substrate on each side of the joint hence the need for a backing rod.
2.10 Joints will be sealed using masonry compatible polyurethane (with proprietary primer) from one of the following suppliers:
• Parchem Phone: 1800 801 108
• Sika Phone: (07) 3633 9222 (QLD), (02) 9725 1700 (NSW), (03) 9797 0600 (VIC), 1300 223 348 (TAS), (08) 9456 3655 (WA)
• Bostik Phone: 1800 621 221
• Selleys 07 32626166