2. Product Selection for Different Applications / Risk Categories
- 4 Minutes to read
- Print
- PDF
2. Product Selection for Different Applications / Risk Categories
- 4 Minutes to read
- Print
- PDF
Article summary
Did you find this summary helpful?
Thank you for your feedback!
2.1 Waterproofing selection will be from the below suppliers unless authorised by the Team leader.
• Chemind – 07 32555755
www.chemind.com.au
• Sika – 07 36339222
https://aus.sika.com/
• Parchem – 07 39022300
www.parchem.com.au
• Bayset – 07 32195899
www.bayset.com.au
• Ardex - 07 38176000
https://ardexaustralia.com/
• Tremco - 07 38899222
www.tremco.com.au
• Xypex - 07 34424300
https://www.xypex.com.au/
• TAM - 07 32053566
https://tamsi.com.au/
2.2 Waterproofing systems are essentially available in 6 systems;
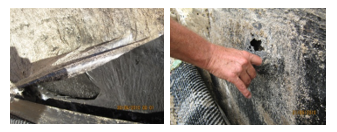
2.2.1 Liquid membranes – wet mix membranes in 20 litre drums that are brush/roller applied to the surface - susceptible to thickness variations in application –and may be either;
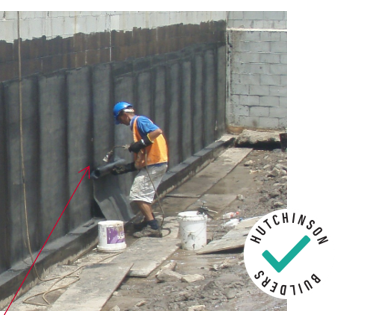
• Acrylic based (compatible with render)
• See photo above right – acrylic bandage over torch on
• Bitumen based (not suitable for render or tiling over)
• See photo right
• Polyurethane based (not suitable for render or finishes)
See photo page 5 of failed PU membrane
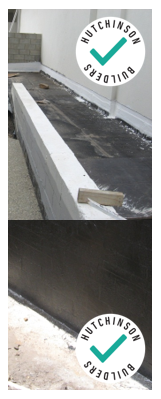
2.2.2 Sheet membrane – adhesive or torch on bitumen based - 3mm + thickness is far less likely to have pin holes during applications

Above - Adhesive bitumen sheet.
Above - 2 layer torch on bitument sheet
2.2.3 Additives –TAM, Xypex and so on - susceptible to excessive cracking when used in external areas like podiums etc - ideal for basement slabs, basement formed concrete walls.
2.2.4 Surface applied additives – TAM, Xypex DS1 – dry shake additives – applied during the pour and power trowelled into the surface. Good secondary waterproofing system that is immediately effective where the membrane will not be applied for some time but you need waterproofing in place – looks a little like a carborundum surface.
2.2.5 Plug’s – grout based additive product to “plug” up around pipe penetrations, wall/floor joints etc.
2.2.6 Injection systems – for repairing leaks where the membrane is not readily accessible. Negative system of this type should be used with caution as repair often pushes the water to other areas and does not stop the water entry into the building system.
2.3 These systems are designed as POSITIVE side waterproofing, or NEGATIVE side membranes. The below diagram explains;
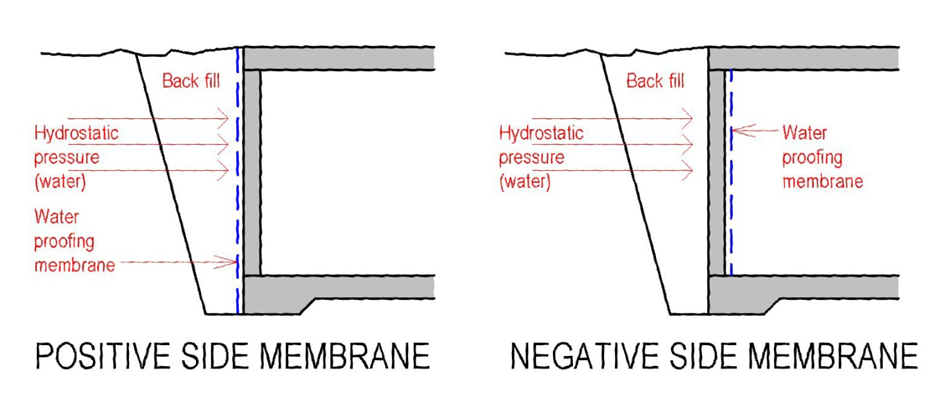
2.4 A positive side system is designed to adhere to the substrate with the water/soil pushing against it and therefore “holding “it against the substrate. It does not need to resist hydrostatic pressure as the water is pressing it against the wall.
2.5 A negative side system is designed to be applied to the other side of the wall and have the hydrostatic pressure of any water against the wall pushing it OFF the wall. So it has to adhere to an inevitably wet substrate (may be dry when applied, but will be wet eventually) and do it with enough strength to resist the hydrostatic pressure form forcing the system off the wall as well.
2.6 So what happens when pressure occurs for both directions?
2.7 Well a negative side system typically caters for both. Additive systems are the same – they are a PART of the structure. So water from either direction typically has no real affect to the waterproofing system.
2.8 Positive side systems however FAIL and/or transfer water to other areas in the building.
2.9 This occurs when a basement floods during or post construction because pump-out systems are not installed during construction; or if they are installed – they lose power, cannot keep up with high flows above design allowances (e.g January 2011 floods in Brisbane) etc. Either way the basement floods and affects lift pits, car parks, services located in the basement etc.
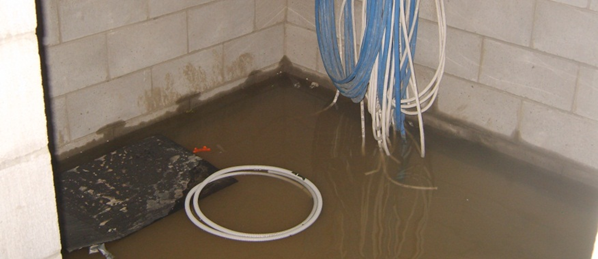
2.10 It also saturates porous structure like block work, and exploits cold and construction joints between walls and floors and so on. When the block work becomes wet, the positive side waterproofing system has reduced bond strength between the coats of waterproofing and/or the waterproofing to substrate - until eventually the bond fails completely and despite being pushed against the wall by hydrostatic pressure, that pressure is now working at a debonded membrane.
2.11 Eventually, over time it will find the weakest point and a leak will eventuate. It may take a drop in water level due to a prolonged dry period, but eventually there will be settlement/movement/heaving of the soil and this will simply tear the “loose” membrane.
2.12 To quote a supplier in respect to a single example of this issue –
1. Due to the Basement flooding the membrane has had water on the negative side. This means moisture would be present up to 1.5 meters above where the water level was due to capillary action.
2. Once the substrate gets wet on the Negative side it is in a situation it has not been designed for.
3. The delamination between coats occurs because the bond strength of the membrane to the substrate is greater than the bond strength of the membrane to itself.
2.13 Precautions may include running a bandage INSIDE the building to provide protection of the membrane – which may change the costs and therefore the selection of waterproofing systems.
2.14 It becomes a difficult and costly exercise to repair this membrane failure.
2.15 The system to be used for any specific area needs to consider available waterproofing systems, negative/positive side application, risk category and water level.
2.16 To simplify this - the below table provides acceptable solutions for the various applications;
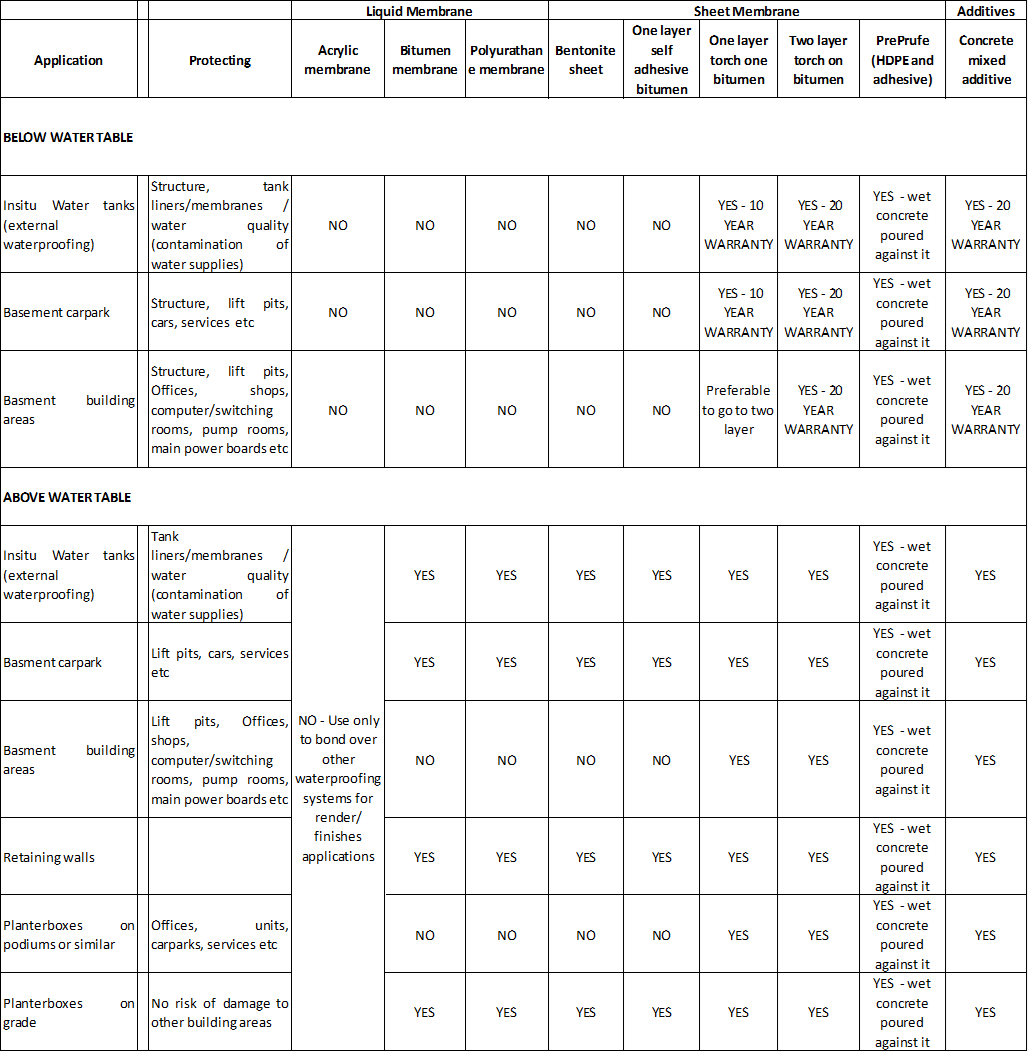
2.17 The contracted waterproofer will provide a copy of the manufacturers waterproofing schedule, technical specifications, MSDS, warranty and manufacturer inspection commitment schedule for approval by the Team Leader prior to commencement of works.
Was this article helpful?